

Table of Contents
- Why Tooled Leather Requires Different Cleaning Care
- What You'll Need to Clean Tooled Leather
- Step 1: Remove Surface Debris and Dust from Tooling Impressions
- Step 2: Clean the Leather with a pH-Balanced Cleaner
- How to Remove Stains from Tooled Leather
- Step 3: Dry and Condition Your Tooled Leather Bag
- Best Leather Conditioner for Tooled Leather and Ongoing Maintenance
- Tooled Leather Maintenance Tips to Preserve Tooling Definition
- Frequently Asked Questions
Last Updated: September 26, 2026
Why Tooled Leather Requires Different Cleaning Care
Clean tooled leather isn't like standard leather. The carved patterns create recessed areas that trap dust, oils, and moisture. These impressions are what make the piece beautiful, but they're also what make cleaning tricky.
Standard leather cleaning methods can damage the tooling definition or leave residue stuck in the carved grooves.
What You'll Need to Clean Tooled Leather
Gather the right supplies before starting. Brush selection is critical, the wrong bristle type will damage the tooling definition permanently.
Essential supplies:
- Soft-bristled brush with natural fibers (boar, horsehair, or goat hair, bristle diameter 0.15-0.25 mm)
- Damp cloth (microfiber or cotton, not paper towels)
- pH-balanced leather cleaner (pH 4.5-5.5 range)
- Leather conditioner designed for genuine leather
- Dry towel for buffing
Why brush bristle type matters for tooled leather:
Natural bristles (boar, horsehair, or goat hair) conform to carved grooves without catching. Synthetic bristles are rigid and catch on tooling edges, scratching the leather grain and creating a worn appearance over time.
For tooled leather, use a brush with 0.15-0.25 mm diameter bristles. Test on a hidden area first, bristles should bend easily against the tooling without resistance.
Denser brushes work for shallow tooling; sparse brushes work for deep grooves (more than 2 mm) where bristles need to reach inside without bunching.
Use microfiber or cotton cloth. Avoid synthetic materials that shed fibers into tooling impressions and paper towels, which scratch the surface.
Use pH-balanced cleaners (4.5-5.5 range) that match leather's natural pH. Avoid all-purpose cleaners, saddle soap, and silicone or wax products, which leave buildup in tooling impressions that's nearly impossible to remove.
Use conditioners designed for genuine leather with natural oils, beeswax, or lanolin. Avoid silicone-based products. Choose thin, oil-based conditioners with consistency similar to light olive oil, not thick cream-based products that pool in grooves.
Step 1: Remove Surface Debris and Dust from Tooling Impressions
Start with a dry clean. Dust accumulates in the recessed patterns and needs to come out first, before any moisture touches the leather.
Use gentle circular motions, working from center outward. Brush along the tooling pattern direction to prevent bristles from catching. Pay special attention to carved areas where dust collects.
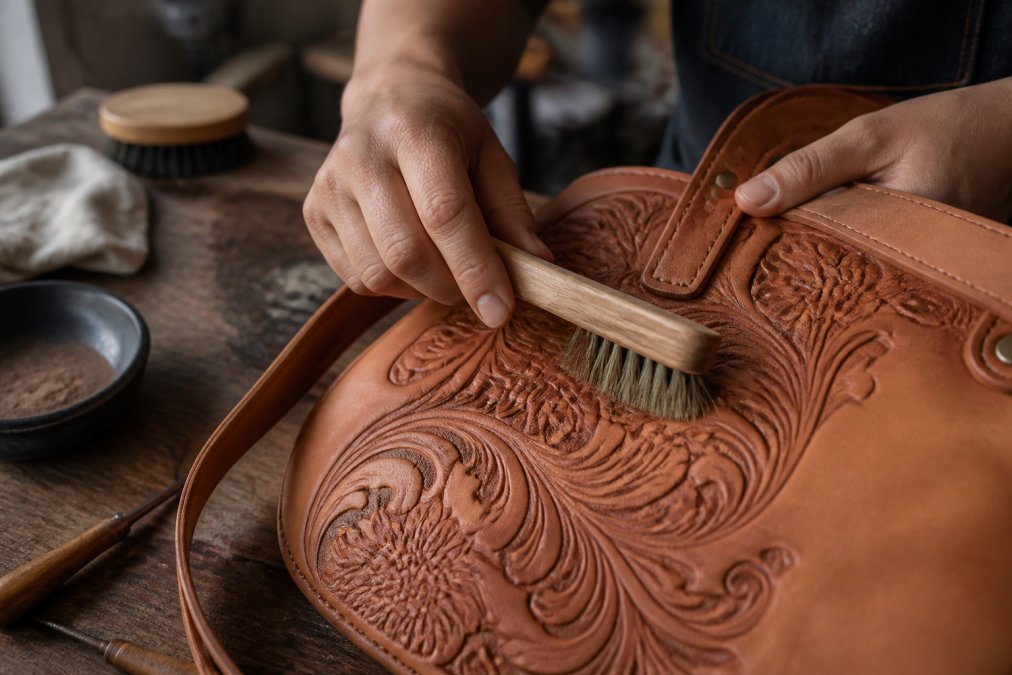
Brush the back and sides thoroughly to prevent dirt from embedding when moisture is applied.
For stubborn dust in deep tooling, use a barely damp cloth to wipe along grooves, removing loose debris only.
Step 2: Clean the Leather with a pH-Balanced Cleaner
Dampen cloth with water and wring it out. Apply cleaner to the cloth, not the bag, to prevent seeping and water stains.
Wipe with gentle pressure using circular motions on smooth areas and following tooling patterns on carved sections. Work in small sections to prevent uneven drying. Use light pressure, let the cleaner do the work, as aggressive scrubbing scratches the grain or pushes residue deeper.
After cleaning, use a second damp cloth with plain water to remove any cleaner residue. This step is essential. Leftover cleaner sits in the tooling and looks dull or sticky. Wipe until the cloth comes away clean with no soapy residue.
How to Remove Stains from Tooled Leather
Stains happen. The question is whether you treat them immediately or let them set.
Blot fresh stains immediately with a dry cloth, don't rub, as rubbing spreads stains deeper. Follow the cleaning process above; pH-balanced cleaner usually removes fresh stains. Repeat on stubborn marks if needed.
For set-in stains, apply cleaner and let sit 2-3 minutes, then wipe gently. Repeat if needed, avoiding excessive scrubbing. For oil stains, use multiple light applications rather than aggressive cleaning.
Hand-Tooled Leather Satchel — Chiseled →
Never use bleach, vinegar, or acetone on tooled leather. These strip the natural oils and can discolor the leather grain or the tooling impressions. They also leave residue that's hard to remove.
Step 3: Dry and Condition Your Tooled Leather Bag
Drying is where most people make mistakes, especially with tooled leather. The carved grooves trap moisture longer than flat surfaces, creating conditions for mold and leather rot if not handled correctly.
After final rinsing, use a barely damp cloth to trace each tooling groove and lift remaining cleaner film. Repeat until the cloth comes away clean. This 5-10 minute step prevents trapped residue from hardening into a waxy layer that dulls tooling, traps moisture, and causes cracking, irreversible damage requiring professional restoration.
Never use heat (hair dryer, radiator, direct sunlight), which dries leather too fast and causes cracking along carved lines. Buff with a dry towel to remove excess moisture, then air dry in a cool, dry area (60-70°F, 40-50% humidity) for 24-48 hours. Do not condition until completely dry.
Apply conditioner while leather is slightly damp (cool to touch, no visible moisture). Use a dime-sized amount per square foot, working it in with circular motions on smooth areas and along tooling direction on carved sections. Avoid puddles in grooves. Let absorb 15-20 minutes, then buff with a dry cloth. Leather should look smooth and slightly lustrous, not greasy.
Post-conditioning drying:
After conditioning, let the bag air dry completely in a cool, dry place for another 12-24 hours before using it. The conditioner needs time to fully absorb and cure. Using the bag too soon can transfer conditioner residue to clothing or other items.
Best Leather Conditioner for Tooled Leather and Ongoing Maintenance
The best conditioner for tooled leather is one designed specifically for genuine leather. Look for products that mention "natural oils" or "leather conditioning" on the label. Avoid silicone-based conditioners, these leave a plastic-like coating that obscures the tooling definition and can trap moisture.
Apply conditioner every 3-6 months, depending on how often you use the bag. Heavy daily use means conditioning more frequently. Light occasional use means you can stretch it to 6 months.
Between full cleanings, maintain your tooled leather bag with quick care:
- Brush gently with a soft cloth weekly to remove dust from the tooling impressions
- Wipe away any visible marks or spills immediately
- Store in a cool, dry place away from direct sunlight
- Never store in a plastic bag, leather needs to breathe
Hand-tooled leather pieces from Lunas Artisanal Shop are crafted to last with proper care. The artisans use genuine leather from Guanajuato, Mexico, and the tooling is done by hand. With the right maintenance routine, these bags develop a beautiful patina over time, a natural darkening and softening that adds character.

Tooled Leather Maintenance Tips to Preserve Tooling Definition
Your tooled leather bag's beauty depends on keeping the tooling definition sharp and clear. Here's how to protect it:
Avoid moisture buildup. Water stains appear as light patches on leather and can blur the tooling impressions. Wipe spills immediately. If your bag gets caught in rain, dry it gently with a soft cloth and let it air dry completely.
Don't overstuff. Overloading stretches the leather and can distort the tooling patterns.
Real tooled leather bags like those crafted at Lunas Artisanal Shop improve with age. The leather softens, the patina deepens, and the tooling tells a story of use and care.
| Maintenance Task | Frequency | Time Required |
|---|---|---|
| Light brushing to remove dust | Weekly | 2-3 minutes |
| Full cleaning with cleaner | Monthly or as needed | 20-30 minutes |
| Conditioning | Every 3-6 months | 15-20 minutes |
| Deep cleaning for stains | As needed | 30-45 minutes |
Additional Resources:
Frequently Asked Questions
How do you get dirt out of the crevices of tooled leather?
Use a soft-bristled brush with gentle circular motions to lift debris from recessed patterns. For stubborn dirt in deep tooling impressions, wrap a slightly damp cloth around the brush tip and work slowly through each carved area. Never force bristles into the grooves; let the brush follow the natural contours of the tooling design. A dry brush works best for regular maintenance.
Can you use saddle soap on tooled leather?
Saddle soap can work on tooled leather, but it's not ideal for intricate carvings because it can leave residue in recessed patterns and may darken the leather unevenly. Instead, use a pH-balanced leather cleaner designed for genuine leather, which cleans without building up in tooling impressions. If you do use saddle soap, test it on a hidden area first and buff thoroughly to avoid residue in the tooling definition.
Does tooled leather require different care than smooth leather?
Yes. Tooled leather has recessed patterns and stamping that trap dirt and dust more easily than smooth surfaces. You need soft-bristled brushes to reach into tooling impressions without scratching the leather grain, and gentler drying techniques to preserve the material integrity of carved areas. Conditioning is equally important to maintain moisture balance in both the raised and recessed sections of the design.
How often should you condition a tooled leather handbag?
Condition your tooled leather bag every 3 to 6 months, depending on use and climate. If you carry it daily or live in a dry environment, condition every 3 months to maintain natural oils and prevent the leather from becoming brittle. Apply conditioner sparingly with a soft cloth, working it gently into the leather grain and tooling patterns. Over-conditioning can make the leather too soft and damage the tooling definition.