

Table of Contents
- What You'll Need to Clean Leather Bag Hardware
- How to Clean Leather Bag Hardware Without Damage
- How to Protect Leather From Metal Cleaners
- Best Metal Polish for Handbags and When to Use It
- Preventing Hardware Tarnish on Leather Bags
- Removing Deep Tarnish and Plating Damage
- DIY vs. Professional Hardware Restoration
- Common Mistakes to Avoid
- Frequently Asked Questions
Last Updated: October 2, 2026
What You'll Need to Clean Leather Bag Hardware
Gather these supplies before you start.
Cleaning supplies:
- Mild dish soap (pH-neutral is best)
- Distilled water
- Microfiber cloth (lint-free)
- Soft cotton swabs
- Small bowl or cup
- Soft-bristled toothbrush (optional, for textured hardware)
Protective supplies:
- Leather conditioner
- Masking tape (painter's tape works well)
- Paper towels
Use gentle, non-abrasive materials. Microfiber cloths won't damage metal or leather; avoid paper towels, which leave residue and scratches.
How to Clean Leather Bag Hardware Without Damage
Cleaning leather bag hardware safely requires patience and the right technique to protect both metal and leather.
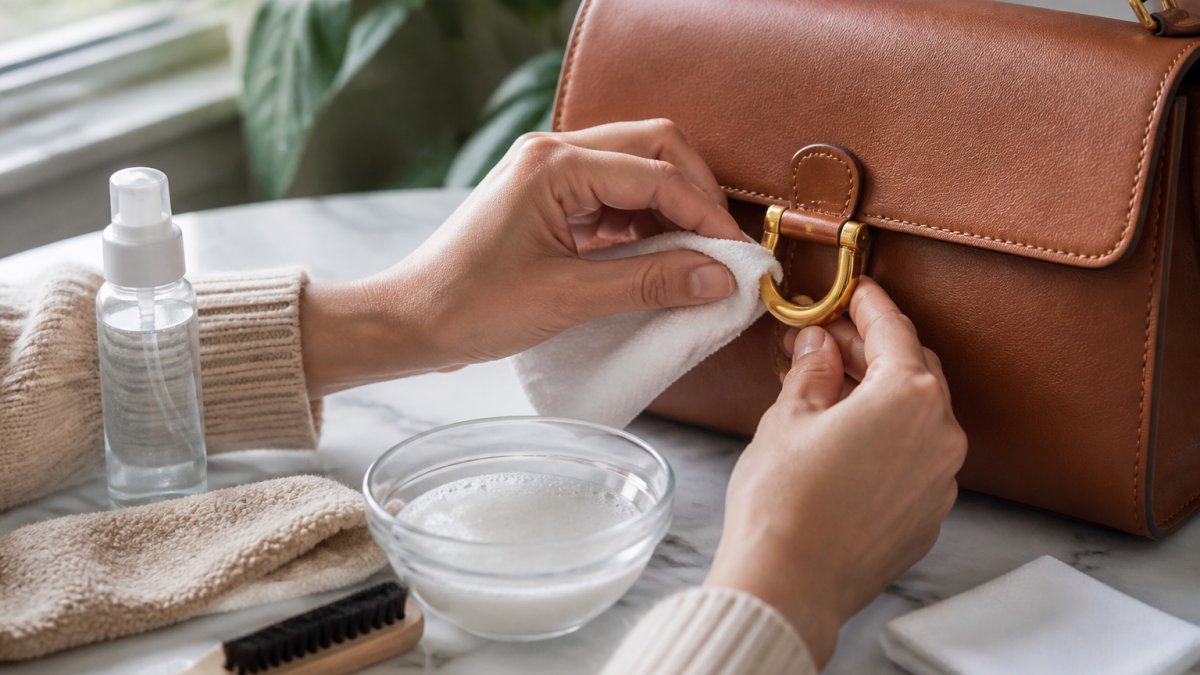
Step 1: Identify Your Hardware Metal Type
Common hardware metals on artisanal leather bags include:
- Gold-tone (plated or solid brass)
- Silver-tone (plated or solid)
- Brass (may develop green patina over time)
- Stainless steel (most durable, least prone to tarnish)
Check your bag's care tag or product description. If unsure, assume plated metal, it's delicate and requires gentler cleaning than solid metal. Test on hidden hardware first.
Step 2: Prepare Your Cleaning Solution
Simple formula:
- Fill a small bowl with distilled water
- Add 2-3 drops of mild dish soap
- Stir gently until combined
The solution should look lightly soapy, not bubbly. This pH-neutral mixture is safe for both metal and leather.
For stubborn tarnish, soak hardware for 5-10 minutes before scrubbing. Don't exceed this time; prolonged moisture damages leather.
Step 3: Test on a Hidden Area
Test on a zipper pull, interior snap, or back pocket hardware. Apply solution with a cotton swab, wait 30 seconds, wipe dry, and check for discoloration, pitting, or finish damage.
If the test area looks fine, you're safe to clean the rest. If you notice any negative reaction, stop and consider professional restoration instead.
Step 4: Clean the Hardware
For light tarnish or dust:
- Dip a microfiber cloth in your cleaning solution
- Gently wipe each hardware piece
- Use a dry cotton swab to reach crevices
- Buff with a clean, dry microfiber cloth
For heavier tarnish or oxidation:
- Apply solution with a cotton swab
- Let it sit for 2-3 minutes (not longer)
- Gently rub in small circular motions
- Wipe away all residue with a damp cloth
- Dry completely with a microfiber cloth
Work one section at a time. Avoid solution on leather; if contact occurs, wipe immediately with a dry cloth.
Step 5: Dry and Buff
Thorough drying prevents water spots and corrosion.
- Use a lint-free microfiber cloth to dry all hardware completely
- Pay special attention to crevices where water can hide
- Buff gently in circular motions to restore shine
- Let the bag air dry for 15-20 minutes before using it
If water spots appear, dampen the cloth with distilled water and buff again to remove mineral residue.
How to Protect Leather From Metal Cleaners
Use painter's tape to mask leather around hardware edges. Work slowly with a damp cloth; never pour solution directly on hardware. Wipe away any solution touching leather immediately. After cleaning, remove tape gently and apply leather conditioner to restore moisture.
Apply leather conditioner after cleaning to prevent drying and cracking near metal pieces.
Best Metal Polish for Handbags and When to Use It
Not all metal polishes are safe for leather bag hardware. The type of hardware determines which polish, if any, will work safely.
Matching Polish to Hardware Metal Type
Solid brass hardware: Brass naturally oxidizes, developing a dull patina or green tarnish.
Plated hardware (gold-tone, silver-tone, or chrome): Plated hardware has a thin decorative layer over base metal.
Stainless steel hardware: Stainless steel resists tarnish naturally.
Silver-tone hardware (solid silver or plated): For silver-plated hardware, use only soap and water.
When to Polish vs. When to Clean
Use gentle cleaning (soap and water) when: Hardware has surface dust, light discoloration, or is plated. Consider polish when: Light tarnish persists after gentle cleaning, hardware is solid brass or silver, and oxidation is uniform. Seek professional help when: Plating is worn, tarnish has pitted the metal, hardware is bent or loose, or the piece is vintage or irreplaceable.
Mini Leather Carryall — Gold Hardware & Top Zip | León Artisan →
Products to Avoid
Avoid: harsh chemical cleaners (bleach, ammonia, acetone), abrasive scouring powders, steel wool, tarnish-removal liquids, and automotive polishes. All damage metal finishes or leather.
The Polish Decision Matrix
When deciding if polish is safe: (1) Identify hardware type, (2) Check the label for "safe for plated metals" or "gentle," (3) Test on hidden hardware for 24 hours, (4) Proceed only if no damage appears.
For most leather bags, mild soap and water handle 95% of hardware cleaning needs. Polish is optional and only for solid metals after testing.
Preventing Hardware Tarnish on Leather Bags
Store bags in cool, dry places away from humidity and sunlight. Wipe hardware monthly with a dry microfiber cloth to remove dust and moisture. Dry your bag after rain or humidity exposure.
Keep your bag dry; moisture and humidity cause tarnish and corrosion. Dry thoroughly after wet exposure.
Removing Deep Tarnish and Plating Damage
Some hardware damage goes beyond what gentle cleaning can fix. Knowing how to assess the damage, and when to stop trying, saves your bag from further harm.
Understanding Hardware Damage Types
Surface tarnish (cleanable): A dull, darkened layer from oxidation or mineral buildup.
Light oxidation (usually cleanable): Greenish/brownish patina on brass or gray/black film on silver.
Deep pitting (not cleanable): Permanent damage appearing as holes, craters, or rough texture.
Corrosion staining (sometimes cleanable): Discoloration from rust or oxidation appearing as dark rings around hardware.
How to Assess Your Hardware Damage
Visual inspection: Look in natural light. Note if discoloration is uniform or patchy, if there are visible holes or pits, and if plating is intact. Tactile inspection: Run your fingernail across hardware. Does it feel smooth or rough? Are there indentations? Moisture test: Apply distilled water to hidden hardware for 30 seconds.
Decision Framework: DIY vs. Professional
DIY cleaning is appropriate when: Hardware has surface tarnish or light oxidation, plating is intact, there's no visible pitting or structural damage, and your bag is relatively new. Professional restoration is necessary when: Hardware shows deep pitting, plating is worn through, hardware is bent or loose, corrosion has penetrated leather, or your bag is vintage or irreplaceable.
What Professional Restoration Involves
Refinishing: Specialists use ultrasonic cleaning or electropolishing to remove deep tarnish without damaging metal. Replating: New plating layers restore appearance and protect base metal. Hardware replacement: Specialists source matching pieces for damaged hardware. Structural repair: Bent or loose hardware can be straightened or reattached without damaging leather.
Cost-Benefit Analysis
Professional restoration typically costs $30-$150+ depending on work needed. For bags worth $300+ or with sentimental value, professional care is worthwhile if hardware damage is significant. For newer bags with minor tarnish, DIY cleaning is sufficient.
DIY vs. Professional Hardware Restoration
Deciding between cleaning it yourself and hiring a professional depends on your bag's value and the damage level.
DIY cleaning works best when:
- Hardware has light tarnish or surface oxidation
- You're comfortable following detailed steps
- Damage is limited to discoloration, not structural
- Your bag is relatively new or in good condition
Professional restoration is better when:
- Hardware shows deep corrosion or pitting
- Plating is wearing through
- Hardware is bent, loose, or damaged
- Your bag is vintage, high-value, or irreplaceable
- You want to preserve the original craftsmanship
The cost difference matters too. DIY cleaning costs under $10 in supplies.
Artisanal bags deserve thoughtful care. Keeping the hardware on your bag clean and protected honors the work that went into creating it.
Common Mistakes to Avoid
Mistake 1: Using tap water, Minerals leave spots.
Keeping your leather bag hardware clean and protected extends the life of your piece and keeps it looking beautiful.
For handcrafted leather pieces, regular maintenance makes all the difference. These bags are made to last years with proper care.
Frequently Asked Questions
How do I clean leather bag hardware safely without damaging the leather?
Use a pH-neutral cleaning solution made from mild dish soap and distilled water. Apply it with a cotton swab or soft microfiber cloth, working only on the metal hardware and avoiding contact with the leather. Dampen rather than soak the cloth, and dry immediately with a lint-free cloth. Always spot test on a hidden area first to ensure the solution won't affect your bag's finish.
What is the safest way to remove tarnish from brass or gold-tone bag hardware?
For light tarnish, use a gentle pH-neutral cleaner with a soft cloth or cotton swab. For stubborn oxidation, a specialized metal polish designed for delicate surfaces can work, but apply it only to the hardware, never let it contact the leather. Buff gently with a polishing cloth, then immediately wipe the hardware clean with a damp microfiber cloth to remove any residue that could transfer to the leather.
How can I prevent hardware tarnish on leather bags?
Store your bag in a cool, dry place away from moisture and humidity, which accelerate oxidation and corrosion. Avoid exposing hardware to perfume, lotions, or cleaning products. Apply a protective coating or hardware sealant designed for leather accessories annually. Wipe hardware with a dry microfiber cloth regularly to remove dust and prevent discoloration buildup.
Is it safe to use jewelry polish on handbag hardware?
Standard jewelry polish can be too harsh for handbag hardware and may damage the plating or finish. Instead, use a metal polish specifically formulated for delicate surfaces or leather accessories. These products are gentler and less likely to create chemical reactions with the leather or leave harmful residue. Always test on hidden hardware first and buff thoroughly to remove all excess polish before it contacts the leather.